Daniel Fisher Wienesen, head of music technology and sound at Leighton Park School, shares ideas for capturing the kit, and how to get that professional sound
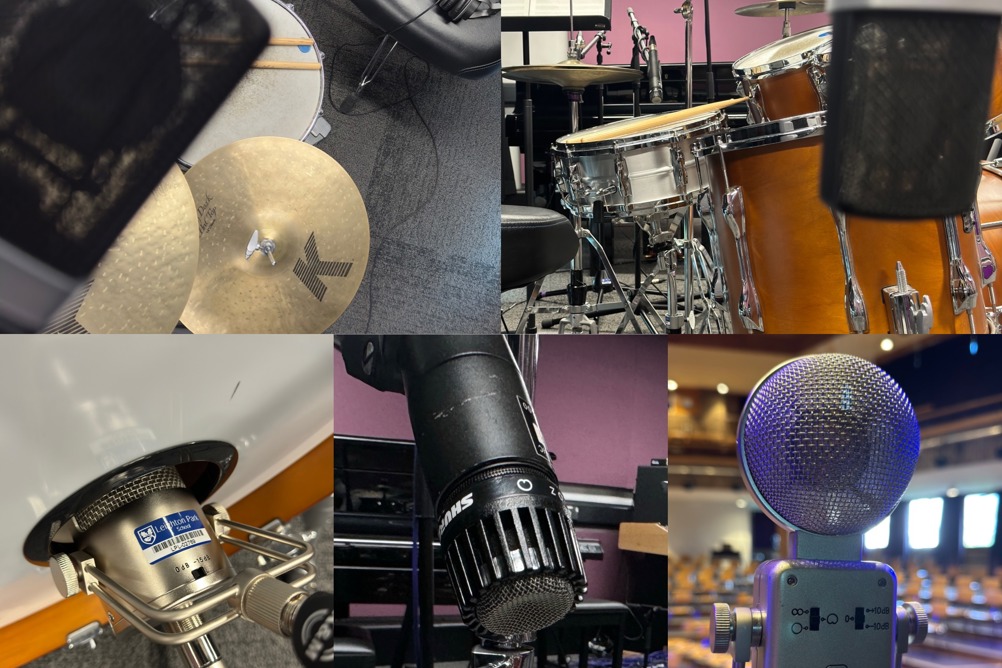
Have you ever recorded drums, played it back, and thought: ‘Why does this sound so thin?’ or, worse, ‘Why does it sound like my kit is under water?’ You're not alone. Achieving a great drum sound isn't simply about setting up some microphones and hoping for the best – several key factors can make or break your recording. Let's dive into some ideas which you could try in your studio.
Tuning your kit
Does tuning really matter? In short, yes! Absolutely. With drums, 80% of the quality of the recording comes from the drum kit itself. It's easy to neglect the treatment of the skins, which can loosen over time and result in flabby-sounding hits, followed by unwanted ringing in the snare and dull recordings. This section will focus on making the most ‘natural’ sound from your studio recordings of the kit.
If you're thinking ‘Maybe I do need to replace the heads on my kit’, you're probably right. Consider opting for heads with built-in damping (e.g. ‘predampened’ options like Evans Dry or Aquarian Studio X). These naturally control overtones, making it easier to achieve a solid core sound right from the tuning stage. These heads usually feature dots, foam, or metal rings, all of which help tame unwanted resonance. As someone who isn't a drummer myself, I've found that the ‘less is more’ approach works best.
Now, with the tuning key in hand, what should you tune the kit to, and how do you go about this?
Here's a general guide:
- Kick drum: 60–100 Hz is best, with the sweet spot at 80, offering a balance between a deep thump and a tight kick.
- Snare: for a solid ‘fat sound’, aim for 200 Hz (2.5 times the frequency of the kick). Anything in the range of 150–250 Hz will work.
- High, mid, and low toms: for high toms, use the same frequency as the snare (2.5 times the kick frequency, around 200 Hz). Mid toms should be tuned to 1.5 times the kick frequency, around 120 Hz. Low toms should be the same frequency as the kick, around 80 Hz.
- Floor tom: this can be flexible, but as a rule, it should be tuned lower than the kick, around 60 Hz.
There's no need to tune your cymbals, as their sound is shaped by the material and shape rather than their tension. If your kit resonates too much or has unwanted ringing, you can use gels or tape to dampen the sound.
This is just a general starter guide. Studio engineers often get bogged down with numbers, but remember to trust your ears. While tuning, be sure to hit the kit and adjust to remove any unwanted resonance. Your ears are the best tuning tool, and there's no fixed ‘correct’ tuning.
Fixing a dull kick sound
If you have a dull kick sound, consider using a three-mic technique for achieving depth and punch. A dull kick can often be the weakest point in a drum recording. You might even question whether you can record a kick on its own, or if you need to layer up an 808 sample to get the punch you want. Timing issues can also arise, leading you to rely on plugins and EQ boosts to ‘improve’ the sound.
But there's a method to fix this – a three-mic trick, described below, for an optional mix of bass drum tones, giving your kick both depth and punch. The components are:
1. Inside kick-drum mic

This is the first mic, positioned inside the kick drum. Some people place the mic without a stand, which can work fine. However, pay attention to the direction of the mic capsule. I recommend pointing it off-axis towards the shell inside the drum to avoid the noise from the drumhead and capture more ‘body’ rather than just the attack. (A pro mic choice for this would be the AKG D12, but affordable alternatives like the Audix D6 or Sennheiser E602ii work great, too.)
Tip: Place a duvet inside the kick drum to reduce resonance and overtones, tightening the sound and creating a more focused kick.
2. Second mic
Place another mic on the outside of the kick drum, positioned against the skin. This mic provides a contrasting timbre compared to the inside mic, offering a balanced sound when blended in. (A popular mic for this is the U47 FET, but for a more budget-friendly option, the Sontronics Delta ribbon mic is rich in tone and blends well with the DM-1B.)
3. Subkick mic
The ‘subkick’, shown in this same photo, is the final piece of the puzzle and adds a missing ingredient to many recordings. A subkick captures deep, low-end frequencies (below 100 Hz) that regular mics often miss, adding weight and depth to the bass drum. This mic helps the kick punch through in mixes, especially for genres like rock and hip-hop, and reduces the need for heavy EQ or bass enhancement.
You can buy a subkick mic like the Solomon LoFReQ Sub Mic, or you can make your own with a second-hand bass speaker or car hi-fi speaker. Reverse the cone to create the mic, then connect it to a balanced XLR cable.
I experimented with an SM57 as a cheaper option on the kick drum and, with some EQing and a gate plugin, I did get some tight punch results. I have taken a screenshot of the EQ in case this is something you want to experiment with:
Once you have all three mics capturing their respective tones, you can blend them for a fuller, punchier sound, combining the high, outer mic for tone, the inside mic for attack, and the subkick for depth.
The five-mic setup
The photo at the start of this article and the diagram here reflect a simple yet effective five-mic setup, using the ‘Glyn Johns method’ plus an added room microphone. This begins with the snare, which is the heart of the kit; mic-ing it well ensures you capture that ‘snare magic’ – the crack and body sound.
By positioning all the mics at the same distance from the snare, you avoid phase issues, ensuring phase coherence, and balance the sound across the kit, which helps the drums sound natural and cohesive.
A five-mic setup – including a room mic that captures ambient sound – could be the following:
- Overheads: two overhead mono mics (e.g. C214s) positioned 3–4 feet above the snare, with the second mic just above the floor-tom skin. These are equi-distant.
- Kick mic (e.g. DM-1B): as described earlier, this is placed inside the kick drum.
- Snare mic (e.g. DM-1S or SM57): position this about 2–5 inches above the snare, equidistant from the centre of the snare head. You can add a second mic underneath the snare.
- Room mic: a large diaphragm condenser mic (e.g. Sontronics Orpheus or Neumann U87), placed around 12 feet away from the kit, to captures the ambient sound and room's character.
The room mic gives the drums a natural, live feel and helps add ambience to the recording. You can fade in the kick and snare mics to add weight and punch.
Post production – blending for a great sound
At this point, if the capture process went well, there should be little work to do in post-production. However, if things still don't sound quite right, you can adjust for more punch or tweak any problematic areas like snare rings or a boomy kick.
Tip: flip the phase
‘Phase’ refers to the alignment of soundwaves captured by microphones. When mics are out of phase, it can cause a thinner, weaker sound. To check for phase issues, try flipping the phase on one mic at a time (such as the snare or kick mic) and listen for changes in tone. My tip here would be to close you eyes and to think of this like an ‘eye test’: does A seem clearer, or does B? Work through the mic captures to get the strongest combined sound.
If the sound becomes weaker or thinner after flipping the phase, revert to the original phase position. This is an easy fix that can be done in most gain utility plugins (such as the Gain plugin in Logic Pro X).
The power of balance
When mixing, less is more. Start by properly gainstaging your tracks. Pull all your tracks to -∞ dBFS and raise the levels to roughly -6 dBFS. Prioritise the overhead and room mics, as these capture the natural sound of the kit. Add in the kick and snare for more weight and punch.
Here are some post-production tips:
- EQ. Tighten the kick drum's low end, brighten the snare for more snap, and reduce harshness in the cymbals. Smooth out any high-end harshness in the toms.
- Compression. Apply just enough compression to control dynamics and add punch to the kick, snare, and toms. Don't overdo it.
- Reverb. Add a touch of reverb to give space, but keep it subtle.
- Panning. Pan the drums naturally to mimic the physical kit.
- Gating. Use gates to remove unwanted bleed from other instruments.
- Transient shaping. Enhance the attack of the drums for more punch without going overboard.
- Bus processing. Apply light EQ, compression, and saturation on the drum bus to glue everything together.
Experimentation
This is the fun bit. When experimenting with room sounds, try recording in unconventional spaces like corridors or hallways. For instance, placing a mic in a long corridor captures the natural reverb and delay, adding depth to your recordings. A corner mic creates a focused, intimate sound, and mic-ing the back of a hall can capture a sense of space, giving recordings an expansive feel.
Experimentation with room types can lead to unexpected, creative results that add originality to your recordings.
You could also switch out some microphones for different ones. Something I learned at Rockfield studios is to change up the overheads for figure of 8 ribbon mics. This gave a great room sound to the capture and added depth to the recording.
Final thoughts
Recording drums can seem daunting with so many factors to consider. But by focusing on tuning your kit, mic placements, experimentation and post-production techniques, you can achieve professional-quality drum recordings without breaking the bank. Always trust your ears, experiment/adapt to your needs, and have fun with the process.